Blog

  • Changing the limit of cross-sell products in the cart – Magento 2

    In Magento 2, by default, a maximum of four products are displayed in the cross-selling section of the cart. In many stores, this limitation is burdensome – especially when the offer is extensive.

    Default cross-sell limit in Magento 2

    In a standard Magento 2 installation, the limit of cross-selling products in the cart is 4. This value is permanently defined in the Magento_Checkout module and cannot be changed from the administration panel.

    Where the cross-sell limit is defined

    The limit is defined in the Magento_Checkout module – in the Crosssell class. File path: vendor/magento/module-checkout/Block/Cart/Crosssell.php.

    As we mentioned above, Magento does not provide configuration for this, so the only correct solution is to overwrite the class using your own module.

    Changing the cross-sell limit via your own module

    You need to create files:

    – preference registration file (di.xml)

    – file overwriting the limit

    LionBrothers/CrosssellLimit/etc/frontend/di.xml:

    <?xml version="1.0"?>
    <config xmlns:xsi="http://www.w3.org/2001/XMLSchema-instance" xsi:noNamespaceSchemaLocation="urn:magento:framework:ObjectManager/etc/config.xsd">
        <preference for="Magento\Checkout\Block\Cart\Crosssell" type="LionBrothers\CrosssellLimit\Block\Cart\Crosssell"/>
    </config>

    LionBrothers/CrosssellLimit/Block/Cart/Crosssell.php

    <?php
    
    namespace LionBrothers\CrosssellLimit\Block\Cart;
    
    class Crosssell extends \Magento\Checkout\Block\Cart\Crosssell
    {
        /**
         * Items quantity will be capped to this value
         *
         * @var int
         */
        protected $_maxItemCount = 8;
    }

    You also need to remember the standard files of each module – registration.php and module.xml.

    Why preference? Why not plugin?

    In this case, the cross-sell product limit is set as a protected property, not a method. This means we can’t change it via plugin (before/after/around). The simplest solution (and best practice) is to use preference and extend the original class.
  • Magento 2 – How to display a CMS block in a PHTML file

    In Magento 2, CMS blocks are most often used directly in XML layouts. However, there are times when you need to display a CMS block directly in a PHTML file, for example, with conditional logic. In this post, we’ll explain how to properly invoke a CMS block in .phtml files.

    Calling a CMS block in .phtml

    <?php
    echo $this->getLayout()
    ->createBlock('Magento\Cms\Block\Block')
    ->setBlockId('id_bloku_cms')
    ->toHtml();
    ?>

    Instead of “cms_block_id” enter the static CMS block ID.

    Important: enter the ID set on the panel side, not the ID from the database.

    Calling a CMS block on a CMS page

    If a CMS block is to be used inside the content of a CMS page, the following directive should be used:

    {{block class="Magento\\Cms\\Block\\Block" block_id="id_bloku_cms"}}

    Calling a static CMS block via an xml (layout) file

    <referenceContainer name="product.info.main"> 
        <block class="Magento\Cms\Block\Block" name="block_identifier"> 
            <arguments> 
                <argument name="block_id" xsi:type="string">id_bloku</argument> 
            </arguments> 
        </block> 
    </referenceContainer>
    Can a CMS block be called conditionally?

    Yes. You can add any PHP logic to the .phtml file, e.g., checking: product type, a given product feature, a customer attribute, etc.).

    Does this solution work in Magento 2.4.x?

    Yes. All described methods are compatible with Magento 2.4.x

    Why is it worth using a CMS block instead of static HTML?

    Because the content placed in the CMS block does not require code deployment after a change and can be freely modified by the administrator (directly from the panel).

  • <meta name=”theme-color”> – Small change, nice effect

    The meta tag <meta name=”theme-color”> allows you to control the color of browser interface elements (such as the address bar), especially on mobile devices – it works in Chromium-based browsers, such as Google Chrome on Android. Place the meta tag in the head section of a web page.

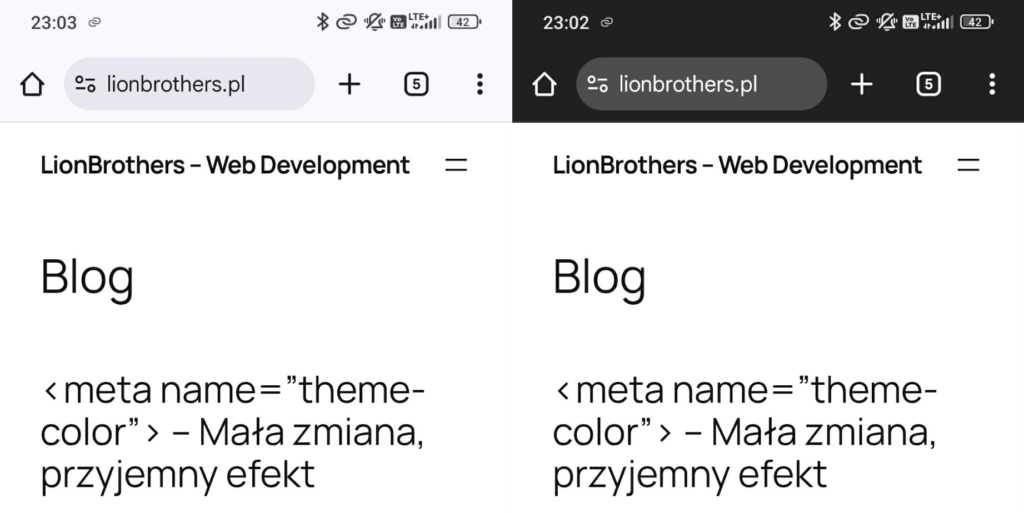
    Below is an example for color #202020:

    <meta name="theme-color" content="#202020" />

    Below is a screenshot:

    It’s worth adding to your projects, especially since it’s only one line of code. Unless your site supports light/dark mode, in which case it’s two lines. You can set the color per mode using the media tag:

    <meta  name="theme-color" content="#202020" media="(prefers-color-scheme: dark)" />
    
    <meta name="theme-color" content="#cccccc" media="(prefers-color-scheme: light)" />
    Does meta theme-color affect SEO?

    Not directly, but it improves the aesthetics of a mobile site, which can indirectly affect user engagement.

    Does theme-color work in all browsers?

    No. Chromium browsers (Chrome, Edge, Opera) offer the best support, especially on Android.

    Is it worth using theme-color in dark/light mode?

    Yes. It’s a small detail that makes a very good impression and increases the consistency of the interface.